Fingerstyle is an essential technique for acoustic guitarists, because it’s used heavily in genres like folk, classical, pop, country and some blues. Instead of using a plectrum, your fingers become fleshy picks, which means you can play distant strings at the same time or in quick succession without accidently catching any others. The overall effect is that multiple voices are playing out at the same time, so you can support a bass-line and a melody with just one guitar. This can create some really cool effects, and it gives you an option for playing unique covers of other musician’s songs. You can play simple open chords in fingerstyle, so it’s a useful technique to pick up as a beginner.
Fingerstyle Basics
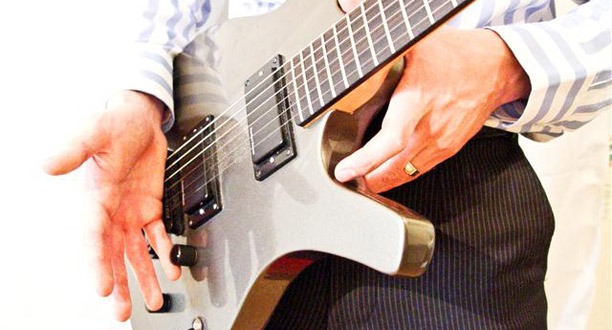
The very basics of fingerstyle are easy to pick up. You play the lower-pitched (bass) notes with your thumb and the higher-pitched (treble) notes with your index, middle and ring fingers. Generally speaking, your thumb can play the notes on the E, A and D strings (the thickest three), your index plays the G string, your middle finger plays the B string and your ring finger plays the high E string. This works for six-string chords, but the roles can change in other situations. In a D or F major chord only four strings are used, so your thumb can play the D and G strings, leaving the B and high E strings for your index and middle fingers. Just go with whatever seems logical, keeping your thumb to the lowest notes.
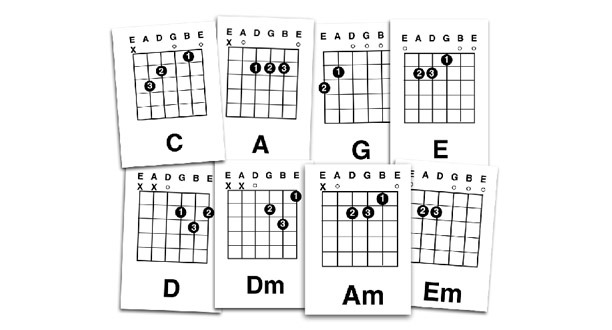
Fingerstyle arrangements are repeating patterns that can be applied to any guitar chord. A simple fingerstyle pattern for a C chord would be to pick the A string, then the B string, then the D string and finish on the G string. If you change to another five-string chord, like A minor, the picking pattern is exactly the same. For a four-string chord like D or F major the pattern is also the same, just make sure your thumb plays the lowest note in the chord to start. Changing to a six-string chord gives you some new options, you can either pick the low E followed by the high E and then any two central strings or just stick to the E, A, D and G strings.
Starting With the Bass
One of the most challenging aspects of playing fingerstyle is keeping the separate parts working independently. Your thumb is the vital in this, because it provides the driving bass-line. Fret an E major chord. Pluck the low E string, then the D string, then the A string and then the D string again. If you’re having trouble holding the beat, play along with a metronome. You can start slow at first and then get faster as you go along. When you have this down, try picking the high E string with your ring finger between the bass notes, remembering to keep the same rhythm going. If you can do that, try to add the E string in at the same time as each bass note as well as between them.
Some Fingerstyle Patterns
Now you have a good understanding of the basics of fingerstyle, you can start to learn some patterns. These can be applied to any chord as long as you make sure that the lowest (and usually the first) note you play is the lowest one included in the chord, or its root note (C in a C chord, D in a D e.t.c.). If you know a little about music theory, you can work out extra notes that can be added into four or five-string chord patterns. For example, in an A chord you can play the low E string, and if you push down the third fret of the low E string you can use it in a C chord.
Here are some basic fingerstyle patterns:
- The best way to start is by playing four notes of the chord in ascending pitch order. In a C chord you would play the A string with your thumb, and then the three treble strings with their dedicated fingers. In a G, you’d start on the E string and then play the three highest strings in the same way. This helps you get used to using all of your fingers.
- You can work a descending run into the same basic pattern. After you reach the high E string, pick the B, G and D strings in that order then finish by plucking the G string. This makes the pattern twice as long.
- Start by picking the lowest two notes one after another, then pluck two of the treble strings at the same time and finish on the highest bass note. For a C chord, this would be the A string, D string, the G and B strings together and then the D string again. Keep repeating this pattern until you get it down.
- More complex patterns are easier to explain for one specific chord. Fret an E major. Pluck the E string, followed by the D and B strings together, the A string, the G string, the D string and finish on the B string. The last four notes should take up the same amount of time as the first two. You can still apply this to other chords, of course. For an A, you start on the A string, then play the D and high E strings together, the low E string, the B string, the D string and finish on the high E.
- You can also experiment and make your own patterns up, just remember to start on the root!
Labeling Your Fingers: PIMA
When you start to learn more fingerstyle patterns, they’ll be displayed through tabs. They label each of your fingers to tell you which should be used for which note. P is your thumb, I is your index, M is your middle and A is your ring finger. Generally, the patterns will follow the basic rules you learned earlier, but if there is a specific method which makes things easier it will be indicated using these letters.


Add comment